Restoration Suite 3
About Restoration Suite 3
Restoration Suite 3 combines DeClip 3, DeClick 3, DeHum 3 and DeNoise 3 in a single plug-in. You build a chain from the modules you need, in the order you want, and adjust each one without leaving the plug-in window.
The Analyze button listens to a few seconds of your audio and builds the chain for you: it decides which of the four modules the audio needs and chooses their main settings. You can then fine-tune the result by hand, or build the chain yourself from scratch.
The User Interface
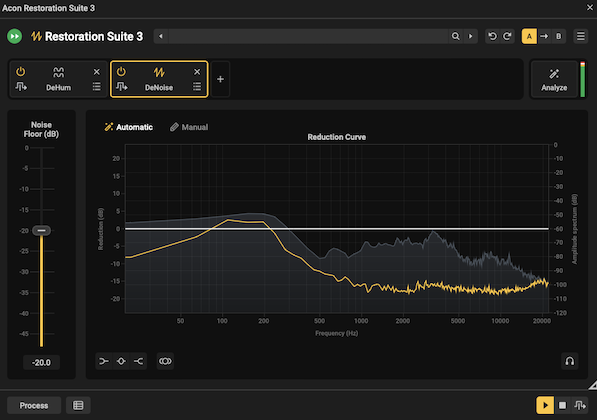
The interface has three parts:

- The header at the top, with presets, undo and redo, A / B comparisons and the processor menu. It works as described in The Plug-in Header Section, and a preset stores the whole chain: which modules are in it, their order, which are bypassed and the settings of each.

- The chain below it, with a tile for each module in processing order, and the Analyze button and an input level meter on the right.
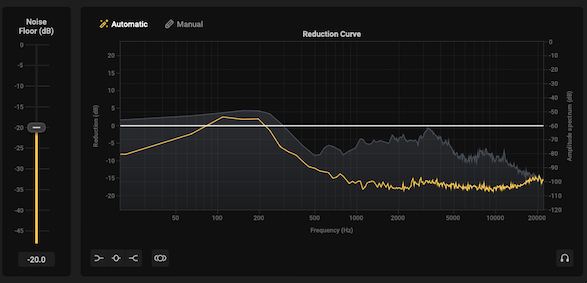
- The module area, which fills the rest of the window and shows the controls of the module selected in the chain.
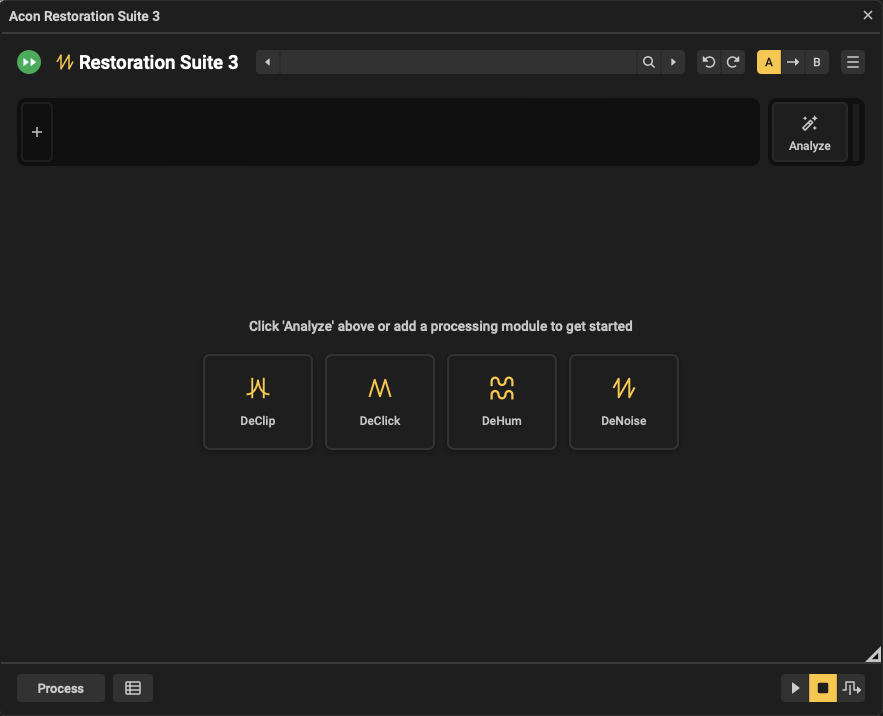
When the chain is empty, the module area shows a button for each of the four modules instead. Click one to add that module, or click Analyze to have the chain built for you.
Building the Chain
Adding modules
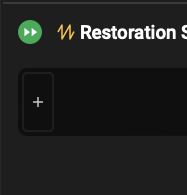
Click the + button at the end of the chain and choose a module from the menu. Each module can be added once, so modules already in the chain are greyed out in the menu, and the + button is disabled when all four are in use.
A module you add is placed at the end of the chain and selected, so its controls appear in the module area.
Selecting a module
Click a tile to show that module's controls in the module area. The selected tile is outlined in the accent colour. The controls are the same as in the standalone plug-in; see DeClip 3, DeClick 3, DeHum 3 and DeNoise 3 for what each one does.
Changing the order
Audio passes through the modules from left to right. Drag a tile sideways to move it to another position in the chain.
The order matters. Clipping and clicks are best repaired before hum and noise are reduced, so that the later modules are not working around them. Analyze always builds the chain in the order DeClip, DeClick, DeHum, DeNoise.
Module tile buttons
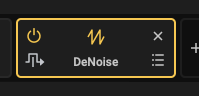
Each tile has four small buttons:
- On / Off (top left) switches the module on or off. A module that is off stays in the chain, keeps its settings and is shown dimmed, but no audio passes through it.
- Bypass (bottom left) bypasses the module. Unlike switching it off, a bypassed module keeps running, so its displays stay live and the plug-in's latency does not change. This makes Bypass the better choice for comparing the sound with and without a module while the audio is playing.
- Remove (top right) removes the module from the chain.
- Presets (bottom right) selects the module and opens its preset menu, so you can load a factory or user preset for one module without changing the rest of the chain.
When the chain holds more tiles than the window can show, a scroll bar appears below them. You can also scroll the chain with the mouse wheel.
Analyze
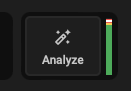
Click Analyze to have Restoration Suite 3 build the chain from your audio. It measures the audio for clipping, clicks and crackle, hum and broadband noise, in that order, and adds the modules the audio needs. Each module sees the audio as the modules before it have already repaired it, just as it will in the finished chain.
Besides choosing the modules, Analyze sets their main settings from the audio:
- DeClip: Positive threshold, Negative threshold and Output gain, detected from the clipping level, with the output gain leaving room for the restored peaks.
- DeClick: Crackle sensitivity, set to the lowest value that removes the crackle, and Click sensitivity, set to a fixed value suited to restoration.
- DeNoise: Noise Floor, set from the measured noise level, so that quiet material is not processed harder than it needs.
Every other setting of every module returns to its default, and no module is left bypassed. A setting you changed by hand before analysing, such as a DeNoise reduction curve, does not carry over into the new chain.
If the audio is clean by every measure, Analyze still adds the one module whose problem came closest to being detected, rather than leaving the chain empty.
Replacing an existing chain
Analyze builds a new chain, so if the chain already holds modules, a message asks before they are removed. Click Proceed to remove them and analyse, or Cancel to keep the chain as it is.
Analyzing playback
In most hosts, Analyze listens to the audio as it plays:
- Click Analyze. If your host is not playing, the plug-in shows Please start playback in your host to analyze audio.
- Start playback of the section you want to restore. The input level meter next to the button shows that audio is arriving, and the plug-in shows Analyzing....
- The analysis finishes by itself after ten seconds of audio, or when you stop playback. You can also click Stop to analyse what has been collected so far.
The chain appears with its first module selected.
Choose a section that is representative of the whole recording, and that contains some of the problem you want removed. Silence before playback reaches the audio is not counted, so it does not matter if playback starts a little early.
Analyzing a selection
When using Restoration Suite 3 in Acoustica as a module or plugin and in Pro Tools AudioSuite, the host is able to hand the plug-in the selected audio directly, so there is nothing to play:
- In Acoustica, select the audio and click the Analyze button next to Process in the processing tool window, or the Analyze button in the plug-in. The button next to Process is greyed out while the selection is shorter than half a second.
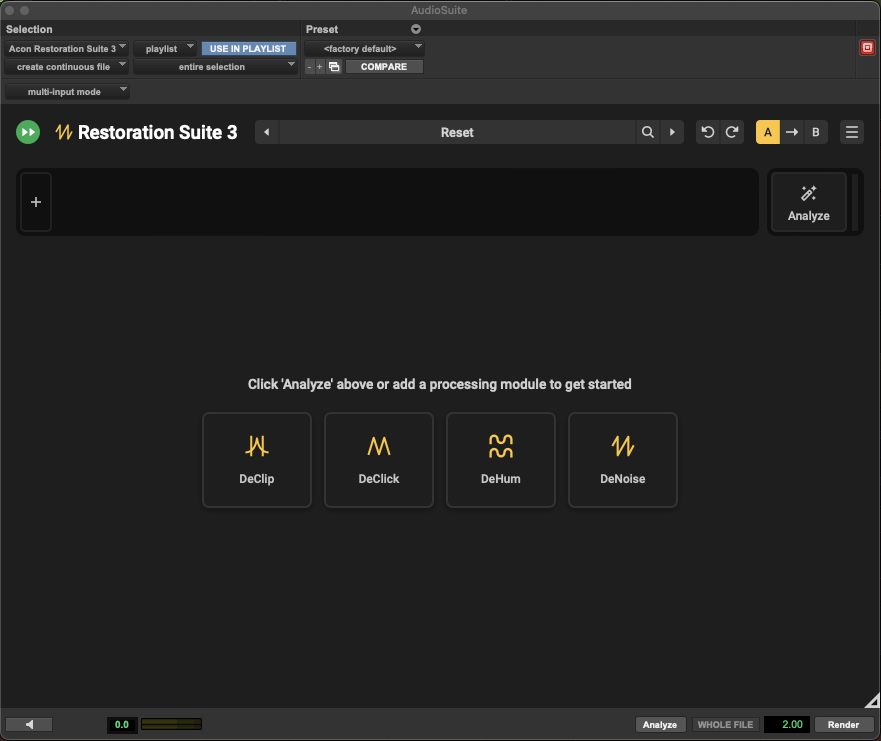
- In Pro Tools, open Restoration Suite 3 from the AudioSuite menu, select the audio and click Pro Tools' Analyze button, or the Analyze button in the plug-in.
Please note: The analysis uses the first ten seconds of the selection. If no selection is long enough, the Analyze button in the plug-in will default to listening to playback instead, as described above.
Automation and Control Surfaces
Every control of every module can be automated in your DAW. The controls are named after the module they belong to, such as DeNoise Reduction or DeHum Frequency, so they can be told apart in the automation list.
In Pro Tools, the controls are also laid out on Avid control surfaces, such as the S6, S4, Avid Control and older surfaces like D-Control and C|24, and a control inside a module shows when it is automated. The S1 and the knobs on the Avid Dock are not supported.